


Oh hey hi
In this tutorial i'll show you the very basics of HTML and CSS so that you can start making your own space
Now, this tutorial isn't complete in any way, and i don't pretend it to be, there will be some stuff i gloss over, so if something you want to do isn't here, look it up!, it works better than what you'd assume
The best places to look for specific tags, attributes and such are definetly W3Schools
and Mozilla's web docs, those resources helped me a lot during the creation of this site
Everything in web making starts the same, with a file called index.html that will define the first site the browser will look for when you enter an adress, and in that file, it always starts with the same sets of tags
Let's talk about tags for a second, they are the basis of the HTML language, and are defined by putting them in between angle brackets, with the beggining defined by nothing but the word, and the end that same word prefaced with a slash
For now, everything we're gonna be doing will be done in the body tag, we're gonna work on the head tag later
One of the most important tags is the p tag, which stands for paragrap; this is the simplest way to put text on your website, so let's add something
And there we go!, we have text now
Now, i mentiond that the p tag was the easiest way to enter text, and that's because there's more ways, for example the h1, h2, ... tags that help you define titles and subtitles, the bigger the number is after the h, the smaller the title will be
There we go, new ways of typing text
Now, an important thing to remember when you're typing is to use linebreaks, since HTML doesn't do it on itself, you can do it with the br tag
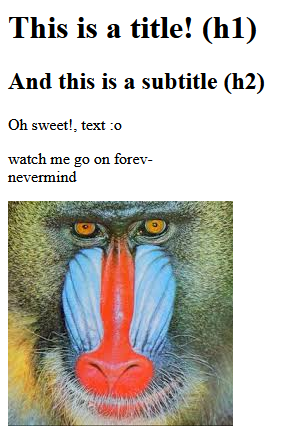
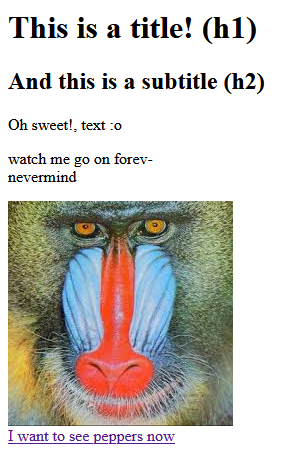
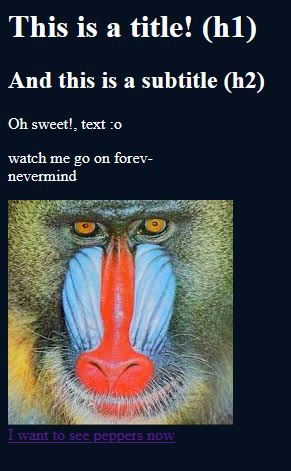
For now, we've only been working using text, of course that's not everything site building has going on, we can also use images with the img tag
which will also help me explain attributes
You see, tags can work in different ways deppending on the attribute, some are just for style, while others are necessary; for the img tag
it's absolutely necessary the src tag, which defines where the image comes from
In this case i will use an image located in the same directory as my html file (which is bad practice, don't do it!), and so to add an image i'll need to type the following
Another important attribute is alt, which is used to define what the image looks like in case someone visiting your site can't see it, either because of computer reasons, or physical reasons, so it's best to be as descriptive as you can
Now, i'll talk about a really important tag, one that defines the internet as we know it today, the a tag.
On it's own, the a tag doesn't seem to do much, just add text, but that's because, just like img, it needs an attribute
to work as it should, int this case, the href attribute, which defines where the object you assigned that tag to will take you
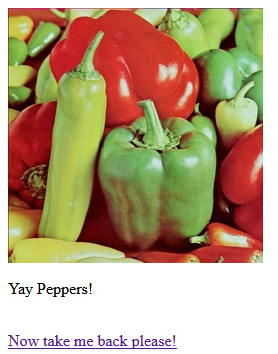
I'm going to create a simple site called peppers.html that will display an image of peppers and some text , and to make a link to it from the index, i'll just type the following
and when we click it...
The a tag of course doesn't have to lead us to a local file, it can lead to a friend's page, a funny video you saw, or anything else on the
internet
Oh, and it can also be attached to an image, or anything that can go in a website for that matter.
As of now we've been working exclusively in our body tag, which makes sense since that's everything any visitor will see, but there's important stuff related to the head tag, including stuff related to styling
It's time to talk about the head tag and CSS
Now, when working on a site with the head tag empty, the name is just the file adress, we can of course change that by using the title tag, like so
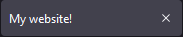
Now it looks more presentable!, but there's still one thing missing from the tab, the favicon
You know how every website has an icon that helps distiguish it at first glance from the tab tray?, we can add our own with the link tag, which defines relationships between our site and other files, to make a file a favicon, we'll need to use the rel attribute (defines what that file does) set to icon
There!, now our site's tab looks a lot better, but the site itself still looks kinda bland
To stylize our website, we'll need to create a new file for a new language called CSS, which is used to alter how our site looks by using classes, IDs, and editig the tags themselves, Let's say, for example, that i want my site to be darkmode, with a black background and white letters, we'll first need to create a CSS file, i'll call it style.css and add the following
Now, this is just a file, it still has no connection with the site we're making, so to add that, i'll have to use the link tag, this time with the "stylesheet" rel
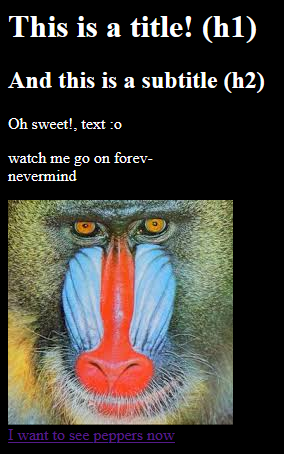
Your only options for colors aren't limited to simple ones, you can use HEX or RGB values to define them too, i'll change the color from pure black to a more easy to look at dark blue
Now, CSS isn't used only for changing the background and the letters, it can be used for more complicated stuff; let's say, for instance
, you want a line of text surrounded by a red border, with a light blue background, with the text underlined and in calibri
Sounds complicated, but it's actually really easy, look
What we've created here is a class (you can tell by the period at the start), it basically determines how a certain part of our website will look like if we put it in a div tag, specifying that class with the attribute with the same name, just like this
That's pretty much it in regards to the very basics of HTML and CSS, if you want more information related to a specific tag, property or attribute,
you can check out the resources i left at the beggining
If you want to continue your site creating journey, i suggest you take a look at the webmap tag, or the textspace
i've been using all over this tutorial, there are resources for everything you can think of
Happy coding!